Claim Updates Import Guide
This guide explains how to create a CSV file for claim updates and import it using the platform's GUI.

Example File
You can download an example CSV file to use as a template:
- Click the "Download Example" action in the header.
- Open the downloaded CSV file in your preferred spreadsheet application.
- Use this as a guide to format your own import file.
By following these guidelines, you can efficiently create and import vendor notes into the platform, ensuring smooth updates to your claim information.
- Fill in the data for each claim update, ensuring that each column corresponds to the correct header.
- Save the file in CSV format.
TIP
You can also import claim updates via the batch feature. For more information, see the Batch section.
CSV Field Descriptions
claim_id: Unique identifier for the claimtype: Type of updatelicense_suspension_status: Current status of license suspensionvendor_program_id: ID of the vendor programvendor_account_number: Account number assigned by the vendorsigned_installment_agreement: Whether an installment agreement has been signed (Yes/No)on_payment_plan: Whether the claim is on a payment plan (Yes/No)secondary_reference_number: Additional reference number, if applicableclose_date_at_vendor: Date the claim was closed at the vendorcurrent_vendor_contact_name: Name of the current vendor contactcurrent_vendor_contact_email: Email of the current vendor contactcurrent_vendor_contact_phone: Phone number of the current vendor contactclaim_status_code: Current status code of the claimlast_rpc_date: Date of the last right party contactlast_call_attempt: Date of the last call attemptlast_letter_date: Date of the last letter sentcarrier_1_name: Name of the first carriercarrier_1_status: Status with the first carriercarrier_2_name: Name of the second carrier (if applicable)carrier_2_status: Status with the second carrier (if applicable)legal_forwarding_firm: Name of the legal forwarding firmlegal_forwarding_account_number: Account number with the legal forwarding firmlast_update_timestamp: Timestamp of the last updatelast_payment_date: Date of the last payment receivedtotal_recovered: Total amount recoverederror: Any error messages or notes
Importing via the GUI
- Log in to the platform and navigate to the Claim Updates section.
- Look for an "Upload" or "Import" button in the header actions.
- Click the button to open the upload form.
- Select your CSV file using the file upload field.
- Click the "Upload" or "Import" button to start the import process.
- The system will process your file and provide feedback on the import status.
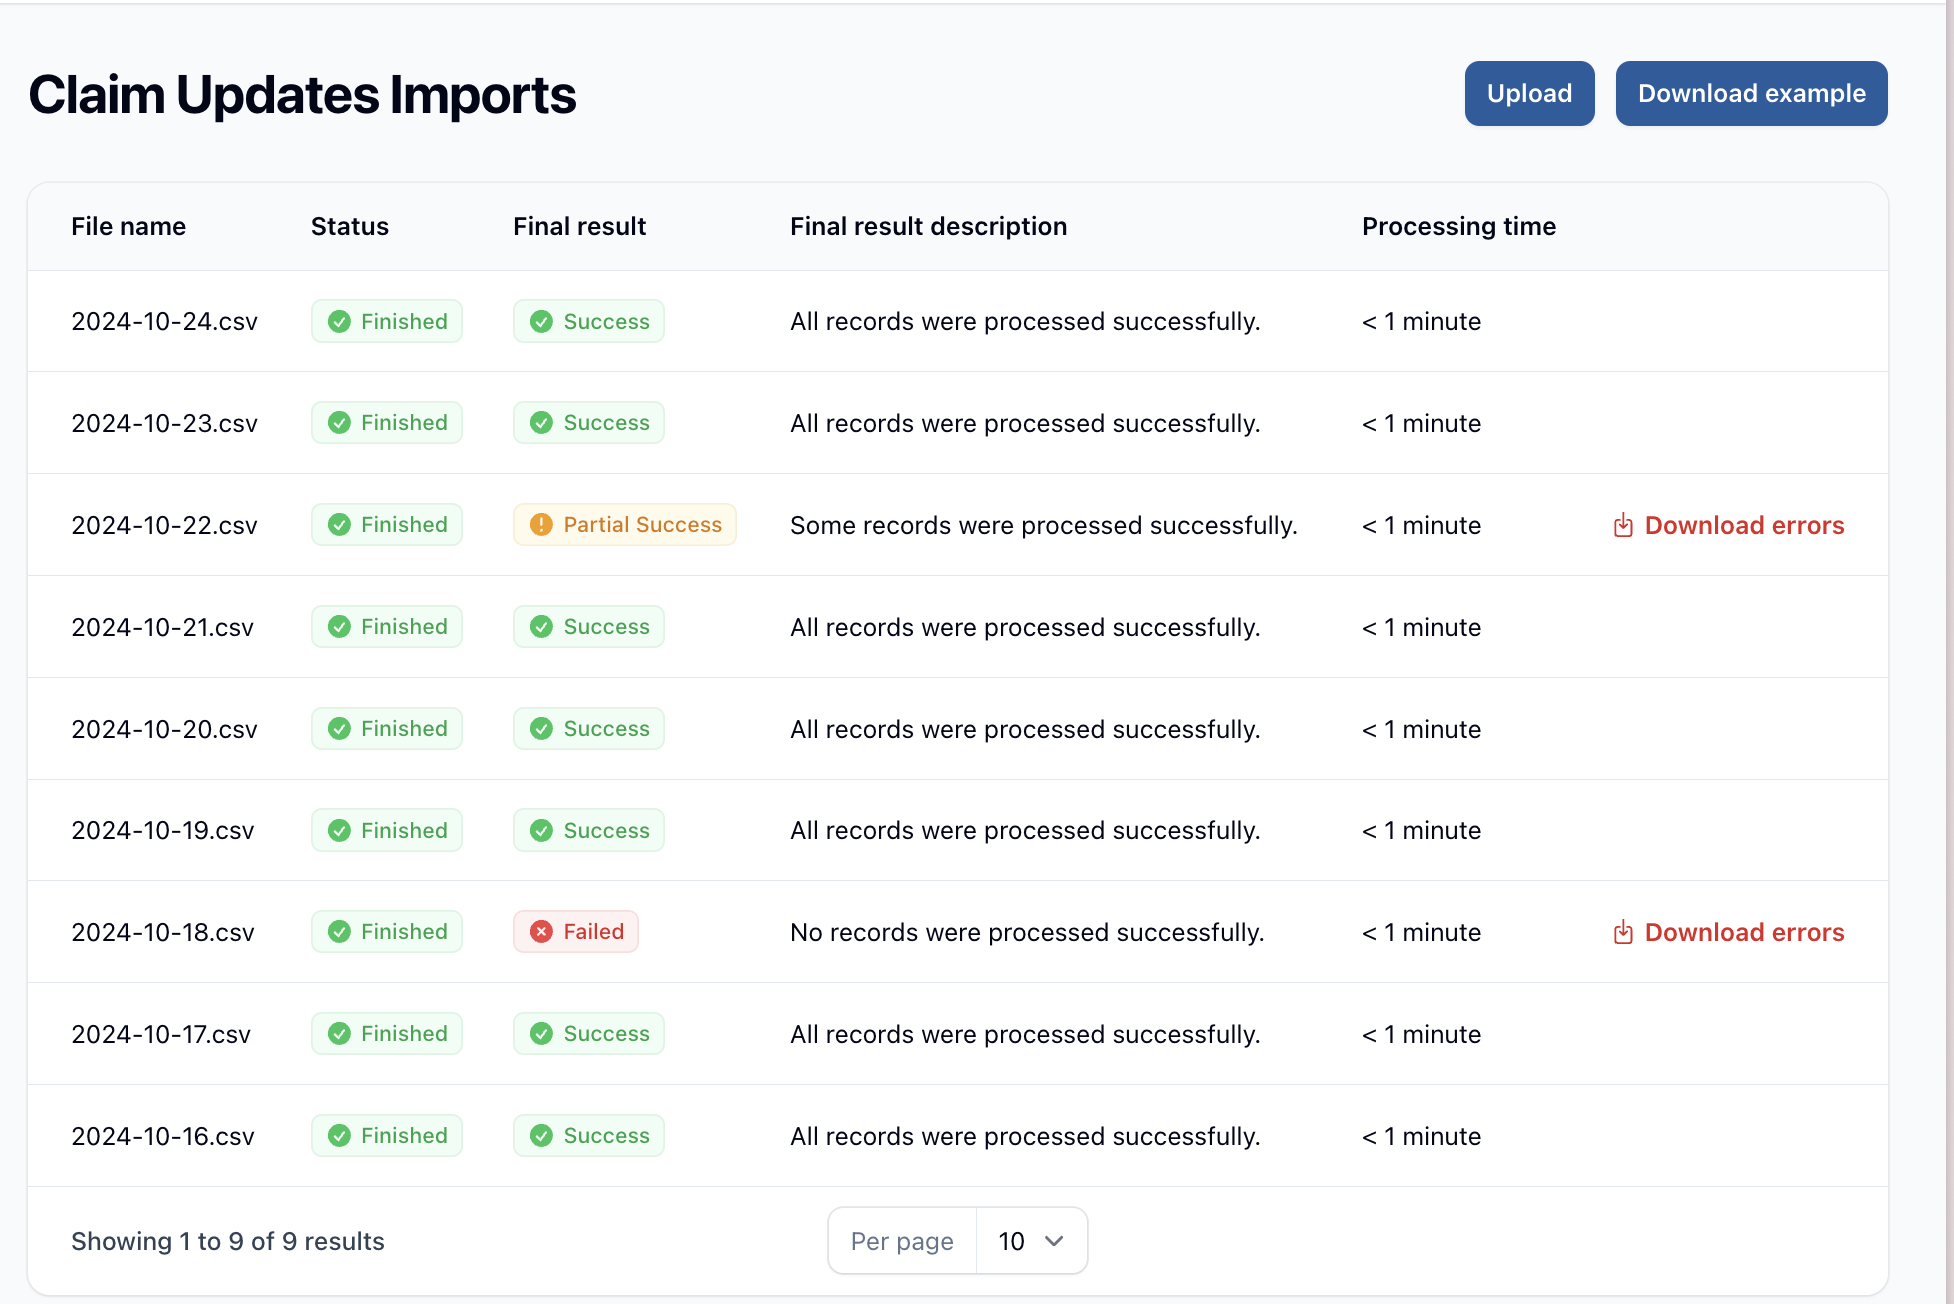
- You can monitor the import progress in the Claim Updates table, which shows:
- File name
- Import status
- Final result
- Processing time
- If there are any errors, you can download an error report for review and correction.
Error Report
If your import contains errors, you can download an error report. This CSV file will contain each field you entered with an additional error column at the end.
This report helps you identify which records failed to import and why, allowing you to make necessary corrections.
Best Practices
- Ensure all claim IDs are correct and exist in the system.
- Ensure all dates are in a consistent format (e.g., YYYY-MM-DD H:i:s).
- Avoid using special characters or formatting in the notes that might cause import issues.
- Review the error report carefully if your import fails, make necessary corrections, and re-upload.